
You’re at the tile shop. Two tiles look almost the same. Same size, same colour, same shine. But one box says “Rectified” and costs a little more.
So what are you actually paying for?
The short answer: it’s all about the edges. And the edges decide how thin your joints can be, how clean the floor looks, and how good your mistri needs to be.
This guide explains rectified vs non-rectified tiles in plain words. How each is made, the joint gap each one needs, what to check on the box, and which one makes sense for your room. No sales pitch. Both types have a place.
Why tiles aren’t all exactly the same size
To understand rectified tiles, start with the kiln.
Every ceramic, porcelain or vitrified tile is pressed from a clay mix and fired at very high heat. During firing, the tile shrinks. And it never shrinks perfectly evenly. Some pieces come out a touch bigger, some a touch smaller, and a few slightly out of square.
So a tile sold as 600×600 mm may actually measure a millimetre or two either way. On one tile you’d never notice. Across a 20-foot hall, those small differences add up.
Manufacturers deal with this in two ways. That’s where the two types come from.
What are rectified tiles?
Rectified tiles are cut or ground to an exact size after firing.
The tile is pressed a little oversized, fired, and then its edges go through a machine that trims all four sides to the final size. What comes out has sharp, straight edges at a true 90° angle, and every piece in the batch is almost exactly the same size.
That precision is the whole point. Because every tile matches, they can be laid with very thin joints, and the floor looks close to one continuous surface.
You’ll see rectification most often on larger tiles, like 600×1200 mm and bigger. The bigger the tile, the more size variation there is to correct. Many of today’s large-format tiles are rectified for exactly this reason.
What are non-rectified tiles?
Non-rectified tiles go into the box exactly as they come out of the kiln.
No extra cutting. Their edges are slightly rounded or softened from the mould. In the trade this is sometimes called a “cushion edge”. The sizes vary a little from piece to piece.
To keep things manageable, factories sort non-rectified tiles into size batches before packing. That’s why their boxes carry a size or calibre code. Tiles with the same code are close enough in size to lay together.
Non-rectified doesn’t mean low quality. It’s simply a different way of handling size. Most small wall tiles, many ceramic floor tiles, and plenty of good vitrified tiles are non-rectified.
A note on the Indian standard
This isn’t just shop talk. The Indian standard for pressed ceramic tiles marks edges as rectified (R) or unrectified (UR). It also sets different size tolerances for each. That’s a good sign the difference matters in practice, not only in brochures.
Rectified vs non-rectified tiles: side-by-side comparison
Here’s the whole difference in one table.
| Rectified tiles | Non-rectified tiles | |
|---|---|---|
| How they’re made | Edges cut or ground after firing | Packed as fired, no edge cutting |
| Edge shape | Sharp, straight, 90° | Slightly rounded or soft |
| Size from tile to tile | Almost identical | Varies a little, sorted by calibre |
| Joint gap | Thin, usually 2 mm or a little more | Wider, usually 3 mm or more |
| Look once laid | Clean, near-seamless | Classic tiled look, joints visible |
| Common sizes | Mostly 600×600 mm and larger | All sizes, very common in small formats |
| Price | Usually a little higher | Usually a little lower |
| Floor needs to be | Very flat | Flat, but more forgiving |
| Mistri skill needed | High | Normal |
| Edge chipping risk | Higher, sharp edges | Lower, softer edges |
Prices vary a lot by brand, size and finish. The gap between rectified and non-rectified in the same range is usually small, not dramatic.
How much joint gap do rectified and non-rectified tiles need?
This is the question that matters most on site.
Rectified tiles: a joint of about 2 mm is the usual minimum. British tiling practice, for example, sets 2 mm as the smallest spacing for rectified tiles and 3 mm for ordinary pressed tiles.
Non-rectified tiles: plan on 3 mm or more. The wider joint soaks up the small size differences between pieces, so the lines still look straight.
Can rectified tiles be laid with zero joint?
No. This is the most common mistake we see.
People hear “rectified” and think “jointless”. Then the mistri butts the tiles tight against each other. It looks lovely on handover day.
The problem is that floors move. Concrete and tiles expand and shrink with heat and moisture, and they don’t move together. A joint gives that movement somewhere to go. With no joint at all, the pressure builds until tiles crack or lift. If you’ve read our guide on why tiles pop up, you’ll know how that story ends.
Thin joint, yes. No joint, never.
Does joint size change how many tiles you need?
Slightly. A wider joint means each tile covers a tiny bit more area, so you need marginally fewer tiles. On a normal room the difference is small, but it’s worth getting right. Our free tile calculator works out tiles and boxes for any room, and the grout calculator shows how joint width changes the grout you’ll buy.
How to tell rectified from non-rectified tiles at the shop
You don’t need to trust the salesman. Check these yourself.
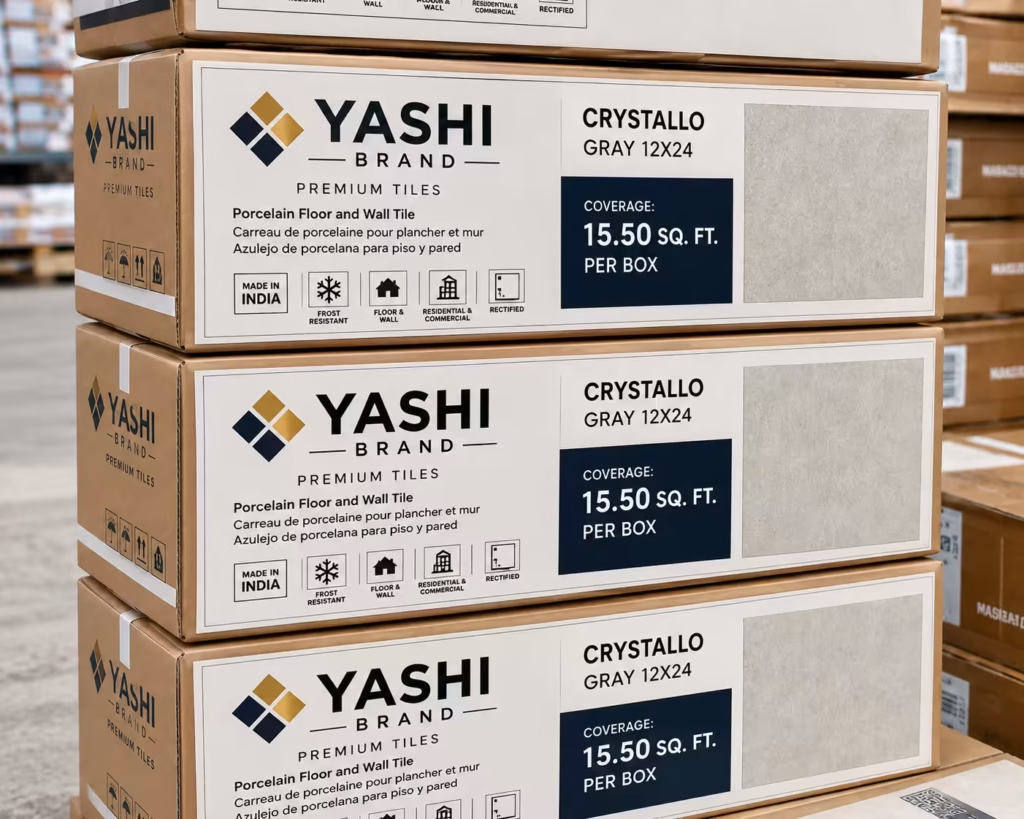
- Read the box. Most manufacturers print “Rectified” clearly on the carton or in the product details. If it doesn’t say rectified, assume it isn’t.
- Look for a calibre or size code. Non-rectified boxes usually carry a calibre number along with the shade or lot number. Rectified boxes often show only shade and lot, since every piece is cut to one size.
- Run your finger along the edge. Rectified edges feel crisp and square. Non-rectified edges feel slightly rounded.
- Put two tiles face to face. Line up two rectified tiles and the edges match almost perfectly. With non-rectified, you may see a small step.
One rule for both types: same shade, same lot
Rectified or not, every tile is fired in batches, and colour shifts slightly from batch to batch. Always buy all your tiles from the same shade and lot number, and keep a few spare. For non-rectified tiles, also match the calibre. Mixing calibres on one floor is how you get wavy joint lines.
Pros and cons of rectified tiles
What’s good
- Thin, even joints give a clean, modern, almost seamless look.
- Less grout on show, so less to stain and clean.
- Easier to keep long joint lines dead straight across a big room.
- Ideal for large formats, where size errors would otherwise be obvious.
What to watch for
- Usually costs a little more than the non-rectified version.
- Sharp edges chip more easily during cutting, handling and laying.
- Needs a very flat base. Any unevenness shows up as lippage, where one tile edge sits higher than the next.
- Needs a careful mistri. Thin joints leave no room to hide mistakes.
Pros and cons of non-rectified tiles
What’s good
- Usually a little cheaper.
- Softer edges chip less and feel kinder underfoot.
- More forgiving on walls and floors that aren’t perfectly level.
- Easier for an average mistri to lay neatly.
- Wider joints suit rustic, traditional and patterned designs.
What to watch for
- Joint lines are more visible, so there’s more grout to keep clean.
- You must match calibre as well as shade, or joint lines wander.
- Not ideal for very large tiles, where size differences become obvious.
Which should you choose? Room by room
There’s no single winner. Here’s how we’d decide.
| Space | Better choice | Why |
|---|---|---|
| Living room, hall, dining | Rectified | Large tiles, big open area, the seamless look pays off |
| Bedrooms | Either | Rectified for a modern look; non-rectified saves a little |
| Kitchen floor | Either | Rectified means fewer grout lines to clean |
| Kitchen dado / backsplash | Either | Rectified for a sleek look; non-rectified is fine for subway-style tiles |
| Bathroom walls | Either | Rectified for large wall tiles; non-rectified is common in smaller sizes |
| Bathroom floor | Non-rectified, usually | Smaller anti-slip tiles and slopes to the drain suit wider joints |
| Balcony, terrace, outdoors | Non-rectified | Wider joints handle heat and movement; base is often uneven |
| Old house, uneven floor or walls | Non-rectified | More forgiving if the base can’t be fully levelled |
| Rustic or patterned designs | Non-rectified | The visible joint is part of the look |
For the bathroom specifically, grip matters far more than edge type. Our guide to the best tiles for bathroom floor covers that in detail.
Is rectified the same as vitrified or porcelain?
No, and this confuses a lot of buyers.
“Rectified” only describes the edges. “Vitrified”, “porcelain” and “ceramic” describe the tile body, meaning how dense it is and how much water it absorbs. A vitrified tile can be rectified or non-rectified. So can a ceramic tile.
If you’re still choosing the body type, read vitrified vs ceramic tiles first, then decide on the edge.

Installation tips for rectified tiles
Rectified tiles reward good work and punish shortcuts. If you’re spending on them, make sure the laying is right.
- Level the base first. With thin joints, even a small dip shows as a raised edge. Get the screed or floor flat before tiling starts.
- Use tile adhesive, not a thick cement bed. Adhesive gives full, even coverage under large tiles. A patchy cement bed leaves hollow spots. More on this in tile adhesive vs cement.
- Back-butter big tiles. Spread a thin coat of adhesive on the back of the tile too, so there are no air pockets.
- Use spacers, and consider levelling clips. Spacers keep the joint even. Clip-and-wedge levelling systems help keep large tile edges flush.
- Leave movement gaps at walls and in big rooms. Keep a gap along the walls, hidden under skirting. On large floors, ask your mistri about proper movement joints too.
- Pick grout that matches the tile. A colour close to the tile makes thin joints almost disappear. For wet areas, see epoxy grout vs cement grout.
- Handle edges with care. Carry tiles on edge, not flat, and don’t knock corners together. A chipped rectified edge is very visible.
For non-rectified tiles
Most of the above still applies. The two extra checks are simple: match the calibre number across all boxes, and don’t squeeze the joints too thin. Tight joints on non-rectified tiles make size differences more obvious, not less.
Bottom line
Rectified tiles are cut to an exact size after firing. They give sharp edges, thin joints of around 2 mm, and a clean, near-seamless floor. They cost a little more and need a flat base and a careful mistri.
Non-rectified tiles are packed as fired. They have softer edges and need wider joints of 3 mm or more. They’re a little cheaper, more forgiving on uneven surfaces, and perfectly good for bathrooms, balconies and rustic looks.
If you’re laying large tiles in a living room on a good flat floor, rectified is usually worth it. For small tiles, wet areas, outdoor spaces or older homes, non-rectified is the sensible choice.
Whichever you pick, buy one shade and lot, keep spare tiles, and never let anyone lay tiles with zero joint.
Frequently asked questions
What is the main difference between rectified vs non-rectified tiles?
The edges. Rectified tiles are cut to an exact size after firing, so they have sharp, square edges and can be laid with thin joints. Non-rectified tiles are packed as fired, with slightly rounded edges and small size differences, so they need wider joints.
Are rectified tiles better than non-rectified tiles?
Not always. Rectified tiles look cleaner and suit large formats and big rooms. Non-rectified tiles are more forgiving, chip less, cost a little less, and work better on uneven surfaces, outdoors and in many bathrooms. The right choice depends on the room and the base.
What joint gap should I use for rectified tiles?
Around 2 mm is the usual minimum. Large tiles, outdoor areas and floors with heating or strong sun may need a little more. Never lay rectified tiles with zero joint.
Can you lay rectified tiles without any grout joint?
No. Floors expand and shrink with temperature and moisture. Without a joint, that movement has nowhere to go, and tiles can crack or lift over time.
How do I know if a tile is rectified?
Check the box or product sheet for the word “Rectified”. Then feel the edge: rectified edges are sharp and square. Non-rectified boxes usually also show a calibre or size code next to the shade and lot number.
Are rectified tiles more expensive?
Usually a little, because of the extra cutting step after firing. In the same range from the same brand, the difference is normally small. Prices vary by brand, size and finish.
Can I mix rectified and non-rectified tiles in the same room?
You can on different surfaces, such as rectified on the floor and non-rectified on the wall. Avoid mixing them on the same surface. Their sizes and edges differ, so joints won’t line up.
Do rectified tiles chip easily?
Their sharp edges are more prone to chipping than the soft edges of non-rectified tiles, especially during cutting and handling. Careful handling, a good cutter and a level floor reduce the risk a lot.
