
You’ve bought the tiles. You’ve sorted the adhesive. Then someone at the shop asks, “Grout kitna dena hai?” and suddenly you’re guessing.
Most people do guess. Some buy far too much and a half-used bag goes hard in the store room. Others run out with three rows left, and the new batch is a shade off. Both are annoying, and both are avoidable.
So, how much grout do I need? For most modern floors with big tiles and thin joints, the answer is surprisingly small, often less than 1 kg for every 100 sq ft. Small tiles and wide joints change that number a lot, though. Below is the formula the grout makers themselves use, a ready chart for common sizes, and two worked examples you can copy.
In a hurry? Our free grout calculator does the maths for you.
The quick answer
| Job type | Rough grout needed |
|---|---|
| 600×600 mm or larger floor tiles, 2 mm joint | About 0.7–0.9 kg per 100 sq ft |
| 300×450 / 300×600 mm wall tiles, 2 mm joint | About 1.2–1.3 kg per 100 sq ft |
| 300×300 mm bathroom floor tiles, 3 mm joint | About 2.4 kg per 100 sq ft |
| Small subway tiles or mosaics | About 4–5 kg per 100 sq ft |
These assume normal cement grout and joints filled to the full tile depth, so add about 10% on top for wastage. Notice the jump? Mosaic needs roughly five times more grout than a big floor tile for the same area, and that’s the single biggest thing people miss.
Why tile size matters more than area
Grout only goes in the gaps. So what you’re really measuring isn’t the floor, it’s the total length of joint lines on that floor.
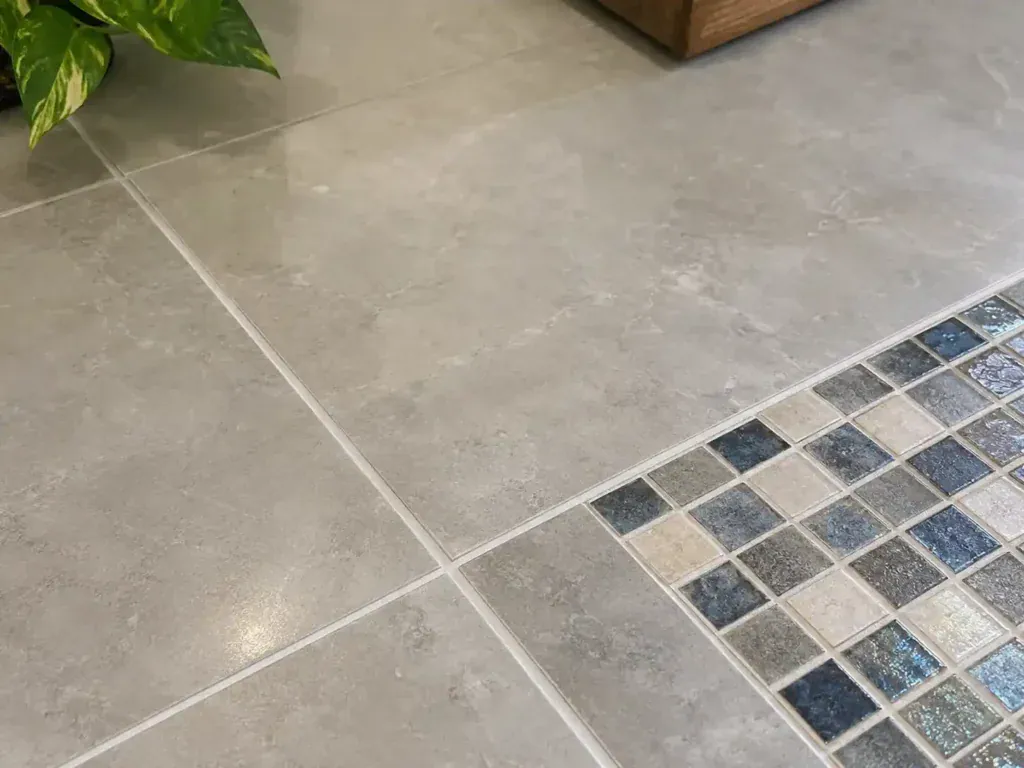
Think about one square metre covered in 600×600 tiles. You’ll have only a handful of lines running across it. Now cover the same square metre in 50 mm mosaic. It’s lines everywhere.
Area only multiplies the final number. What really sets the rate is these three:
- Tile size – smaller tiles mean more joints per sq ft.
- Joint width – double the gap, double the grout.
- Joint depth – usually close to the tile thickness, so thicker tiles take more.
The grout formula (it’s simpler than it looks)
This is the standard consumption formula printed on many grout data sheets:
Grout (kg per m²) = (L + W) ÷ (L × W) × joint width × joint depth × density
Where:
- L = tile length in mm
- W = tile width in mm
- Joint width = the gap between tiles, in mm
- Joint depth = how deep the grout goes, in mm (usually about the tile thickness)
- Density = weight of the grout, roughly 1.6 for most cement grouts
The answer comes out in kg per square metre. To get kg per sq ft, divide by 10.764.
Let’s try it once
Take a 600×600 mm vitrified tile, 9 mm thick, laid with a 2 mm joint.
- (600 + 600) ÷ (600 × 600) = 1200 ÷ 360,000 = 0.00333
- 0.00333 × 2 × 9 × 1.6 = 0.096 kg per m²
That’s under 100 grams per square metre. Tiny. Which is why a single small pack can finish a whole room of large tiles.
How deep is the joint, really?
On paper, depth equals tile thickness. On site, it’s often a little less, because some adhesive squeezes up into the gap. If you’ve cleaned the joints out properly (and you should), using the full tile thickness gives you a safe, slightly generous figure.
Check the thickness on the tile box. Don’t guess it from the face size; two 600×600 tiles from different ranges can differ by a couple of millimetres.
What about density?
Density is simply how heavy the grout is for its volume. Different products sit somewhere around 1.4 to 1.9, depending on the brand and type. If the bag or data sheet gives a figure, use that. If not, 1.6 is a fair working number for ordinary cement grout.
Working in inches or feet?
A lot of people think of tiles in feet or inches, like a 2×2 ft or 12×24 inch tile. That’s fine, but convert everything to mm before you use the formula. One inch is 25.4 mm. With feet, the trade usually treats a 2 ft tile as 600 mm and a 1 ft tile as 300 mm, which is close enough for grout.
Joint widths work the same way. A 1/16 inch joint is about 1.6 mm, and a 1/8 inch joint is about 3 mm. Once every number is in mm, the formula works exactly as shown above, and so does our chart.
Grout per sq ft: chart for common tile sizes
Worked out with the formula above, using density 1.6 and joint depth equal to a typical tile thickness. No wastage included.
| Tile size (mm) | Joint width | Joint depth | kg per m² | kg per 100 sq ft |
|---|---|---|---|---|
| 600 × 1200 | 2 mm | 9 mm | 0.072 | 0.67 |
| 800 × 800 | 2 mm | 9 mm | 0.072 | 0.67 |
| 600 × 600 | 2 mm | 9 mm | 0.096 | 0.89 |
| 600 × 600 | 3 mm | 9 mm | 0.144 | 1.34 |
| 600 × 600 | 5 mm | 9 mm | 0.240 | 2.23 |
| 300 × 600 (wall) | 2 mm | 8 mm | 0.128 | 1.19 |
| 300 × 450 (wall) | 2 mm | 8 mm | 0.142 | 1.32 |
| 300 × 300 | 3 mm | 8 mm | 0.256 | 2.38 |
| 75 × 150 (subway) | 2 mm | 7 mm | 0.448 | 4.16 |
| 50 × 50 (mosaic) | 2 mm | 4 mm | 0.512 | 4.76 |
Look at the three 600×600 rows. Same tile, but going from a 2 mm joint to 5 mm almost triples the grout. Joint width is the dial that moves the number most, after tile size.
Your tile isn’t listed? Plug it into our grout calculator and you’ll have the figure in a few seconds.
Worked example 1: a living room floor
Say your hall is 200 sq ft, tiled in 600×600 mm vitrified tiles, 9 mm thick, with a 2 mm joint.
- Convert area: 200 ÷ 10.764 = 18.58 m²
- Grout per m² (from the chart): 0.096 kg
- Grout needed: 18.58 × 0.096 = 1.78 kg
- Add 10% for wastage: 1.78 × 1.10 = 1.96 kg
So about 2 kg covers the whole room.
If you haven’t worked out your tile count yet, our tile calculator handles that part using the same tile size and area.
Worked example 2: a full bathroom
Bathrooms are trickier, because walls and floor usually have different tiles.
Walls: 150 sq ft of 300×450 mm tiles, 8 mm thick, 2 mm joint
- 150 ÷ 10.764 = 13.94 m²
- 13.94 × 0.142 = 1.98 kg
Floor: 40 sq ft of 300×300 mm anti-skid tiles, 8 mm thick, 3 mm joint
- 40 ÷ 10.764 = 3.72 m²
- 3.72 × 0.256 = 0.95 kg
Total: 1.98 + 0.95 = 2.93 kg. Add 10% and you’re at about 3.2 kg.
The floor is less than a third of the wall area, yet it eats nearly half as much grout. Smaller tiles, wider joint. That’s the pattern you’ll see again and again.
In practice, buy around 3.5 kg here. Bathrooms have niches, corners and pipe cut-outs, and those all take a bit more than the formula thinks.
Epoxy grout: does the calculation change?
The volume part doesn’t change at all, because a gap is a gap. What changes is the density figure, which varies quite a bit between epoxy products. Some data sheets use around 1.5, others around 1.7, so take the density from the pack you’re actually buying and run the same formula.
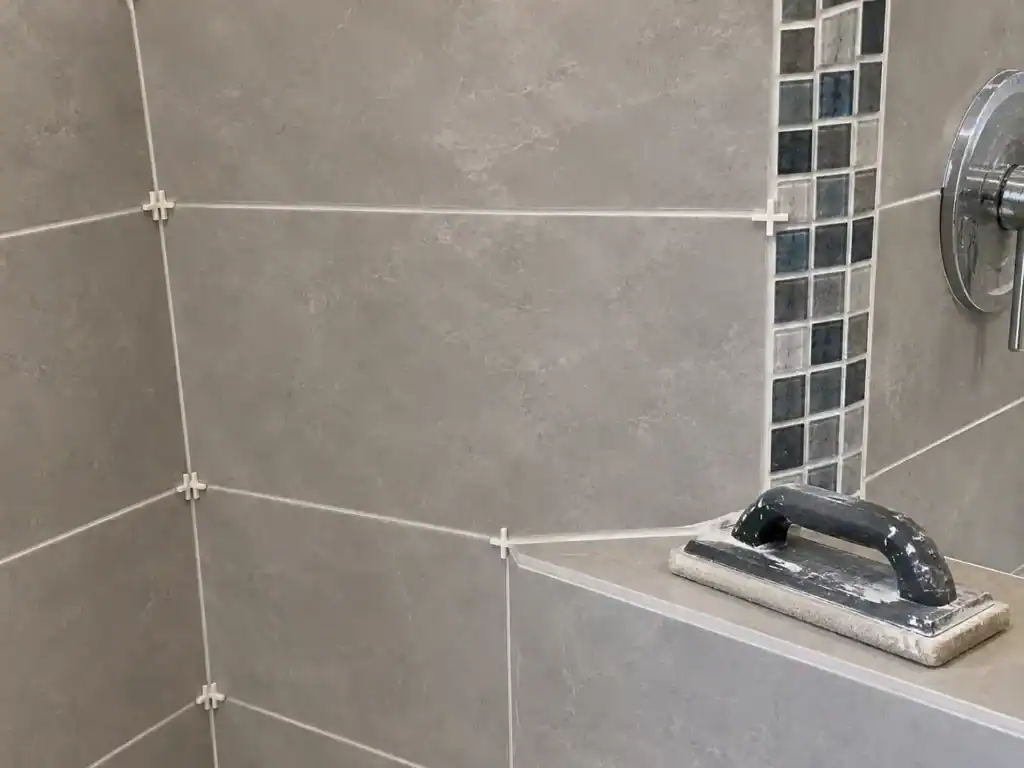
The bigger difference is practical. Epoxy comes as two parts (resin and hardener) that you mix together, and once mixed it has a limited working time before it sets. Mix more than you can spread and the rest is wasted. Many people also find the kit is easiest to mix whole, so plan your area around full kits.
Trying to decide between the two? Our epoxy grout vs cement grout comparison covers stain resistance, cost positioning and where each one makes sense.
Grout for marble and granite floors
Stone works on the same formula. Two things are different, though, and both change your number.
First, stone is usually thicker than a vitrified tile. A deeper joint means more grout, even with the same gap. Measure the actual piece, or ask the supplier, before you calculate.
Second, stone joints are often kept very tight. Polished marble floors in particular are laid with hairline gaps so the floor reads as one surface. Narrow joints cut the grout down a lot.
Here’s a quick example. A 600×600 mm granite tile, 16 mm thick, laid with a 1.5 mm joint:
- (600 + 600) ÷ (600 × 600) = 0.00333
- 0.00333 × 1.5 × 16 × 1.6 = 0.128 kg per m²
- That’s about 1.2 kg per 100 sq ft
One word of caution. Gritty, sanded grout can scratch a polished stone face while you’re working it in. Ask your stone supplier which joint filler they recommend for that particular stone, and test it on a spare piece first.
Still working out how much stone to order? Get that figure first. The stone area you order is the same area you’ll use for grout.
Work it out for your own room in 5 steps
No chart entry matches your tile? Fine. Grab a phone calculator and follow along.
- Measure the area in square feet. Floors are length × width; walls are the width of each wall × tiling height. Our area calculator helps if the room is an odd shape.
- Read the tile box. Note the size in mm and the thickness.
- Decide the joint width with your tiler. Large rectified tiles often go 2 mm; handmade or rustic tiles need wider.
- Run the formula to get kg per m², then multiply by (area ÷ 10.764).
- Add 10–15%, divide by the pack size and round up.
Do the walls and floor separately if they use different tiles. Then add them together. That’s it.
How much extra grout should you buy?
Add 10% for a normal floor or wall with straight joints.
Go up to 15% if:
- it’s a bathroom with lots of corners, niches or cut-outs
- you’re laying tiles diagonally or in a herringbone pattern
- the tiles have rough, textured or rustic edges
- it’s someone’s first grouting job (honestly, more ends up on the sponge)
One more reason to buy a little extra: colour matching. Grout from a different batch can look slightly different once dry. A small leftover pack, kept sealed and dry, is also handy for patch repairs later.
Things that quietly use up more grout
The formula assumes a perfect job. Real sites aren’t perfect. Watch for these:
- Uneven joints. If the tiler didn’t use spacers, some gaps end up 2 mm and others 4 mm. Grout follows the widest ones.
- Joints not cleaned out. Odd as it sounds, dirty joints use less grout, which is a problem. Adhesive left in the gap means a shallow grout line that cracks and lets water in.
- Pillowed or chamfered tile edges. Rounded edges leave a small extra channel on top of the joint.
- Mixing too much at once. Cement grout starts to stiffen after a while. Whatever hardens in the bucket is lost.
- Heavy sponge cleaning. Too wet a sponge drags grout out of the joint, and you go back and fill again.
Common mistakes when estimating grout
Even people who’ve done a few jobs slip up on these. Most of them cost you a second trip to the shop.
Buying by area alone. Someone sees “200 sq ft” and picks up the same quantity they used last time, for a completely different tile. As the chart shows, the same room can need under 2 kg or more than 9 kg, depending on the tile and joint.
Forgetting the walls. In bathrooms and kitchens, the wall area is often three or four times the floor area. People calculate the floor, forget the walls, and end up short by a wide margin.
Mixing up mm and cm. Some data sheets list tile size in cm. Plug cm into a formula built for mm and your answer is ten times off. Keep every measurement in mm.
Ignoring skirting and steps. Skirting strips are narrow, so they carry a lot of joint for very little area. Stair treads and risers add up too. Include them in your area and lean toward the 15% extra.
Trusting the coverage line on the pack. A printed coverage figure is usually worked out for one tile size and one joint width. If your job is different, your coverage will be different too. Run your own numbers.
How to turn kg into packs
Grout is sold by weight, but pack sizes vary a lot. Small packs of around 1 kg are common for home jobs, and bigger bags are made for contractors. Check the pack size on the shelf, then:
Packs to buy = total kg (with extra) ÷ kg per pack, rounded up.
For the bathroom above, 3.2 kg ÷ 1 kg packs = 3.2, so 4 packs.
Prices vary by brand, type and region, so we don’t list figures here. As a rough guide, plain cement grout is the budget option, polymer-modified cement grouts sit in the middle, and epoxy is the premium choice.
While you’re shopping, sort the adhesive too. Our tile adhesive calculator gives you the bag count for the same area.
Bottom line
- Grout depends on tile size, joint width and joint depth, not just area.
- Use: (L + W) ÷ (L × W) × width × depth × density for kg per m².
- Large floor tiles with 2 mm joints need under 1 kg per 100 sq ft.
- Mosaics and small subway tiles can need 4–5 kg per 100 sq ft.
- Add 10% for wastage, 15% for tricky layouts and bathrooms.
- Buy everything from one batch for an even colour.
Or skip the maths entirely and use our free grout calculator.
FAQs
How much grout do I need for 100 sq ft?
It depends on your tiles. For 600×600 mm floor tiles with a 2 mm joint, you’ll need roughly 0.9 kg. For 300×300 mm tiles with a 3 mm joint, around 2.4 kg. Small mosaics can need 4–5 kg. Add 10% on top of any of these.
How much area does 1 kg of grout cover?
With large 600×600 mm tiles and thin 2 mm joints, 1 kg of cement grout can cover around 100 sq ft or more. With small tiles or wide joints, the same kilo may only cover 20–40 sq ft.
Why do small tiles need so much more grout?
Because grout fills the joints, and smaller tiles create far more joint lines in the same area. A 50 mm mosaic has many times more joint length per square foot than a 600 mm tile.
Does joint width really make a big difference?
Yes. Grout quantity rises in direct proportion to joint width. Going from a 2 mm to a 4 mm joint doubles the grout needed, with the same tiles and the same area.
Is epoxy grout calculated the same way as cement grout?
The formula is the same. Only the density value changes, and that varies by brand, so use the figure on the pack. Epoxy also has a limited working time once mixed, so plan for a little extra wastage.
Should joint depth be the full tile thickness?
Ideally, yes. Joints should be cleaned of adhesive so the grout can fill most of the tile’s depth. Using the full thickness in your calculation gives a safe estimate.
How much extra grout should I buy?
About 10% for simple floors and walls, and 15% for bathrooms, diagonal layouts or textured tiles. Keeping one spare pack from the same batch helps with future repairs.
Do I need to seal grout after applying it?
Cement grout is porous, so sealing helps it resist stains and moisture, especially in kitchens and bathrooms. Epoxy grout generally doesn’t need sealing. Our guide on do you need to seal grout goes into detail.
How much grout do I need for a 10×10 room?
A 10×10 room is 100 sq ft. With 600×600 mm tiles and a 2 mm joint, that’s roughly 0.9 kg, or about 1 kg with wastage added. With 300×300 mm tiles and a 3 mm joint, plan for around 2.6 kg.
Can I use leftover grout later?
Unopened dry grout keeps for a while if it’s stored sealed and dry, but check the shelf life printed on the pack. Mixed grout can’t be saved. Once it starts to stiffen, throw it away rather than adding more water, because re-wetted grout ends up weak and patchy.
